
Fuel gauge

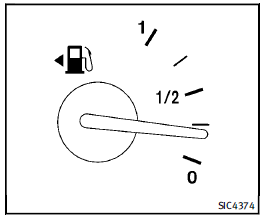
The gauge indicates the approximate fuel
level in the tank.
The gauge may move slightly during
braking, turning, acceleration, or going up
or down hills.
The gauge needle returns to 0 (Empty) after
the ignition switch is pushed to the OFF
position.
Refill the fuel tank before the gauge
registers “0” (Empty).
The low fuel warning  appears on the
dot matrix liquid crystal display when the
fuel tank is getting low. Refuel as soon as it
is convenient, preferably before the gauge
reaches “0”. There will be a small reserve
of fuel in the tank when the fuel gauge
needle reaches “0”.
The
appears on the
dot matrix liquid crystal display when the
fuel tank is getting low. Refuel as soon as it
is convenient, preferably before the gauge
reaches “0”. There will be a small reserve
of fuel in the tank when the fuel gauge
needle reaches “0”.
The  indicates that the fuel-filler door is
located on the driver’s side of the vehicle.
indicates that the fuel-filler door is
located on the driver’s side of the vehicle.
 CAUTION
► If the vehicle runs out of fuel, the
 malfunction indicator light (MIL) may
come on. Refuel as soon as possible.
After a few driving trips, the
malfunction indicator light (MIL) may
come on. Refuel as soon as possible.
After a few driving trips, the
 light
should turn off. If the light remains on
after a few driving trips, have the vehicle
inspected by an INFINITI retailer.
light
should turn off. If the light remains on
after a few driving trips, have the vehicle
inspected by an INFINITI retailer.
► For additional information, see “Malfunction
Indicator Light (MIL)” later in
this section.
See also:
Vehicle Dynamic Control (VDC) system
The Vehicle Dynamic Control (VDC) system
uses various sensors to monitor driver
inputs and vehicle motion. Under certain
driving conditions, the VDC system helps
to perform the following funct ...
To protect your vehicle from corrosion
• Wash and wax your vehicle often to keep the vehicle clean.
• Always check for minor damage to the paint and repair it as soon as possible.
• Keep drain holes at the bottom of the doors open to avo ...
Driving safety precautions
Your INFINITI is designed for both normal and off-road use. However, avoid driving in deep water or mud as your INFINITI is mainly designed for leisure use, unlike a conventional off-road vehicle.
...